A bedroom that falls below 16°C overnight does not necessarily need a larger radiator or a more expensive heating system. The problem may be an uninsulated external wall, a suspended timber floor, a draughty window junction or an exposed room position that allows heat to escape faster than expected.
The most effective bedroom insulation upgrade is the one that addresses the room’s dominant heat-loss path. Insulating a suspended floor can make a noticeable difference to cold feet, while internal wall insulation may improve comfort across a room with persistently cold external walls. Neither measure can guarantee a minimum overnight temperature without considering outdoor conditions, heating schedules and other heat losses.
For UK households with limited budgets, a short inspection before committing to building work can prevent costly mistakes. The important distinction is between making the bedroom feel warmer, slowing its overnight temperature drop and ensuring that new insulation does not trap moisture inside the building fabric.
Bedroom insulation: the essentials
- Identify the coldest building element first. External walls, floors above unheated spaces and draughty junctions require different solutions.
- Match insulation to the construction. Suspended timber floors, concrete slabs, cavity walls and traditional solid walls cannot all be treated identically.
- Protect against moisture. Wall insulation needs a compatible moisture-control strategy, careful junction detailing and adequate ventilation.
- Why Is One Room Always Colder Even When the Heating Is Balanced?
- How to Prioritise Room Insulation Using a 20-Minute Evening Walkthrough?
- Internal Wall Insulation or Floor Insulation: Which Fixes Cold Floors Faster?
- The Single-Room Insulation Mistake That Can Create Hidden Mould Behind Boards
- When Should You Install Internal Insulation to Avoid Condensation During Curing?
- How to Find the 3 Biggest Heat-Loss Spots in Your Home in 30 Minutes?
- Why Do “Easy” Energy Upgrades Cut Bills by Only 5–10% in Winter?
- Why Your EPC Rating Stays Low After Spending £2,000 on Upgrades?
Why Is One Room Always Colder Even When the Heating Is Balanced?
One bedroom can remain colder than the rest of a house because its walls, floor or windows lose heat faster, even when the radiators are properly balanced. Room orientation, wind exposure and the spaces underneath also matter. Correct radiator settings do not compensate automatically for a poorly insulated building envelope or unusually cold internal surfaces.
A radiator primarily warms the room by transferring heat to the air and surrounding surfaces. When an external wall remains cold, occupants can still feel uncomfortable despite the air thermometer showing 16°C. This happens because thermal comfort depends partly on the temperature of the surfaces surrounding the body, not simply on the measured air temperature.
Building specialists describe this combined effect using operative temperature, which accounts for air temperature and mean radiant temperature, with the relative influence depending on air movement and other conditions. A bedroom with cold walls and glazing can therefore feel substantially less comfortable than another room recording the same air temperature.
Three common causes need separating before selecting insulation:
- Envelope heat loss: Poorly insulated external walls, glazing, ceilings or floors allow heat to pass out of the room.
- Orientation and exposure: A room facing prevailing winds or receiving little winter sunlight may experience different thermal conditions from a sheltered bedroom.
- Room position: A bedroom above an unheated garage, cellar or exposed void may lose heat through the floor as well as its external walls.
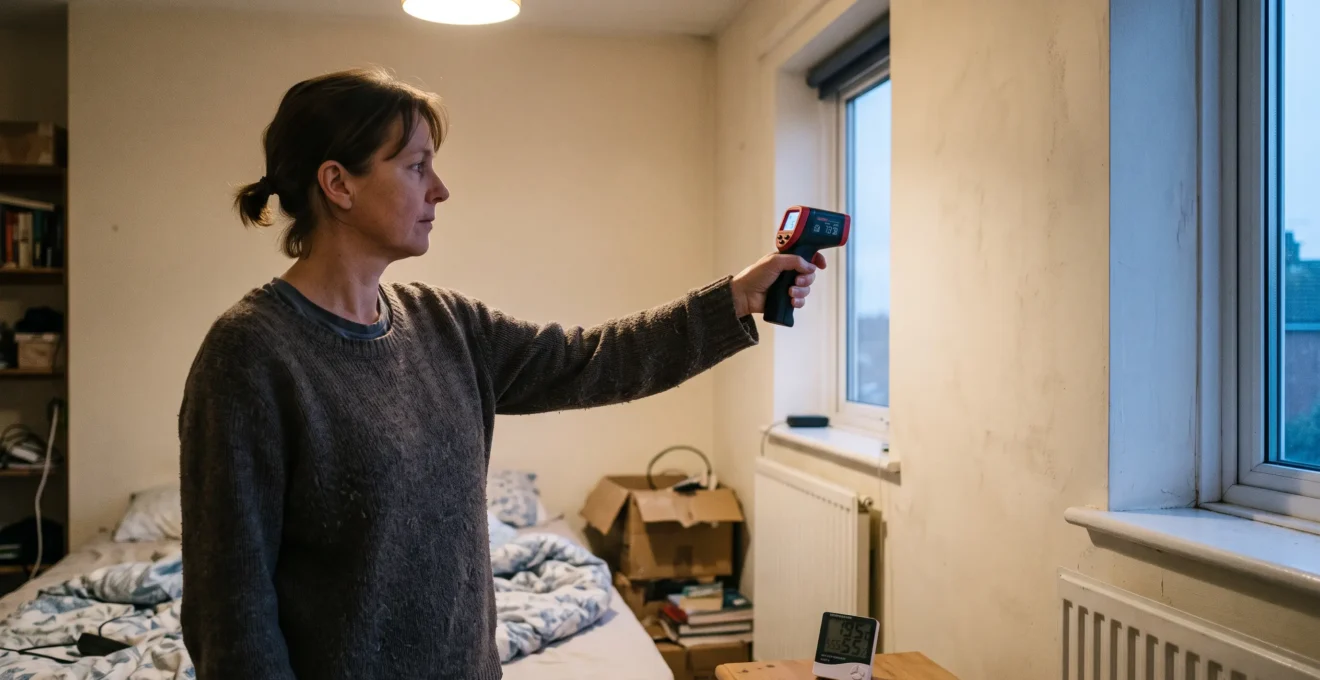
A simple comparison helps identify the likely problem. Use an infrared thermometer to compare an external wall with an internal partition after the heating has been running. Measure comparable, dry, matt surfaces and avoid interpreting readings from reflective finishes as reliable temperatures. Alternatively, use the back of your hand to identify areas that feel unusually cold.
Record the bedroom air temperature at bedtime and again before the heating restarts. A rapid early drop may reflect the room’s changing thermal conditions after heating stops, while continued cooling towards morning can indicate ongoing heat losses. These patterns are clues rather than conclusive proof: outdoor temperature, air leakage, heating schedules and thermal mass all affect the result.
If the objective is to remain above 16°C overnight, first identify the coldest surfaces and measure the actual overnight temperature pattern. Only then can insulation be matched to the elements most likely to be responsible.
How to Prioritise Room Insulation Using a 20-Minute Evening Walkthrough?
A 20-minute evening walkthrough can help prioritise bedroom insulation by identifying cold external surfaces, obvious draughts and adjoining unheated spaces. Spend five minutes on each of four checks, then rank potential improvements by the severity of the problem, installation feasibility and moisture risk. This is a household screening method, not a substitute for a professional heat-loss assessment.
Choose an evening when the heating has been operating normally and there is a noticeable temperature difference between indoors and outdoors. A notepad, room thermometer and optional infrared thermometer are sufficient for an initial inspection.
- Minutes 0–5: Map external boundaries. Identify external walls and windows, and check whether the bedroom sits beneath a roof or above an unheated space. Sketch the room and mark each exposed surface.
- Minutes 5–10: Compare temperatures. Check exposed walls, internal partitions and accessible floor areas. Note where surfaces feel noticeably colder, or record comparative infrared readings.
- Minutes 10–15: Locate draughts. Feel around skirting boards, window frames and accessible junctions. Look for persistent dust tracks around gaps. Avoid inserting objects into electrical fittings or removing socket covers.
- Minutes 15–20: Assess construction and feasibility. Note whether the property has solid or cavity walls, timber or concrete floors, and any signs of previous insulation. Record uncertainties rather than guessing.
The next step is to turn these observations into a practical priority rather than immediately selecting the largest project.
Air movement can sometimes be visualised with smoke, but an incense stick introduces a flame and indoor pollutants. If one is used, keep it away from curtains, bedding, insulation and combustible materials, and do not use it near suspected gas leaks. Feeling for draughts or arranging a professional airtightness inspection is safer where conditions are uncertain.
| Assessment factor | Higher priority | Lower priority or further investigation |
|---|---|---|
| Cold-surface evidence | Repeatable, substantial difference between exposed and sheltered surfaces | Small or inconsistent difference requiring further checking |
| Installation feasibility | Accessible area with a clearly identified construction type | Major disruption, inaccessible voids or uncertain construction |
| Moisture risk | Dry construction with a suitable assessed insulation method | Existing damp, recurring mould or incompatible surface finishes |
A cavity-wall property may be better served by assessing appropriate cavity insulation or external measures before sacrificing internal bedroom space. A traditional solid-wall property requires a different approach because moisture transport through the existing masonry can strongly influence insulation suitability.
Existing damp or recurring mould changes the priority completely. Such warning signs call for investigation and remedial work before additional insulation is installed.
Your five-item bedroom insulation decision checklist
- Sketch the bedroom boundaries and mark every external or unheated adjoining area; produce one labelled room diagram.
- Measure and record bedroom air temperature at bedtime and in the morning; produce a dated two-reading log.
- Compare exposed and internal wall surfaces under similar conditions; produce a short list of temperature differences or tactile observations.
- Record draught locations and photograph any damp staining; produce an annotated defect list.
- Identify the likely wall and floor construction, marking unknown details; produce a shortlist of suitable assessments or interventions.
The highest-priority project should be the one that addresses convincing evidence of heat loss without creating an unresolved moisture problem. That makes the wall-versus-floor decision considerably easier.
Internal Wall Insulation or Floor Insulation: Which Fixes Cold Floors Faster?
Floor insulation is generally the more direct intervention when the discomfort comes from a cold floor above an unheated, accessible void. Internal wall insulation instead addresses heat loss and radiant discomfort associated with an exposed wall. Neither upgrade is universally faster or more effective: the answer depends on the floor construction, the main source of heat loss and installation constraints.
A suspended timber floor above a ventilated void can allow heat to escape through gaps and inadequately insulated floorboards. Appropriate insulation between the joists, combined with suitable airtightness and moisture detailing, may improve floor surface comfort and reduce draughts. The work can sometimes be carried out from beneath the floor, limiting disruption to the bedroom itself.
Where the main problem is a cold external wall, insulating the floor may leave the dominant source of discomfort untouched. Correctly designed internal wall insulation can increase internal surface temperatures and reduce heat flow through the treated wall, but it also introduces wall junctions and moisture considerations.
| Criterion | Internal wall insulation | Floor insulation |
|---|---|---|
| Best match | Persistently cold external wall | Cold floor or exposed space beneath |
| Comfort effect | Warmer wall surfaces and reduced heat transfer | Potentially warmer floor surface and fewer floor draughts |
| Typical disruption | Wall finishes, sockets, skirting and radiators may need alterations | Floorboards may need lifting unless there is suitable access below |
| Space implications | Reduces usable room dimensions | May affect floor height if installed above existing flooring |
| Key technical concern | Interstitial moisture and thermal bridges | Subfloor ventilation, moisture and floor construction |
The distinction becomes especially important with solid concrete ground floors. Unlike an accessible suspended floor, a concrete slab cannot simply be insulated from an open void underneath. Insulating above it may require raising the floor level, adjusting doors and thresholds, and considering accessibility. More extensive work may be needed where the existing floor assembly is unsuitable.
Before choosing a system, look for signs of subfloor ventilation, accessible cellar space or visible joists. Air bricks may suggest a suspended construction, but they do not prove the arrangement beneath a particular bedroom. Have the construction confirmed before work begins.
The UK government best-practice guidance on solid floor insulation emphasises assessing existing floors, understanding their moisture behaviour and selecting compatible materials and installation methods.
In an older property, the moisture behaviour of a solid floor and adjoining walls also needs attention. Introducing an unsuitable impermeable layer may alter where moisture accumulates or dries.
If the floor is demonstrably the weak point, investigate floor insulation first. If the external wall dominates, assess wall insulation instead, with particular care given to the risk of trapping moisture behind the new finish.
The Single-Room Insulation Mistake That Can Create Hidden Mould Behind Boards
The most consequential mistake when insulating one bedroom is installing internal wall insulation without a moisture-control design suited to the existing wall. Insulation makes the original masonry colder during winter. If moisture enters the assembly and cannot escape or dry safely, condensation and mould may develop behind the boards, remaining invisible until substantial damage has occurred.
Warm indoor air contains water vapour. If that moisture reaches a sufficiently cold surface, condensation may occur. Internal insulation can shift the temperature profile across a wall, increasing the importance of controlling air leakage, vapour movement, rain penetration and drying potential.
The problem is more complicated than simply identifying a dew point. Moisture may move through an assembly by air leakage, vapour diffusion and capillary transport. The performance of the system also depends on rainfall exposure, existing wall moisture and the properties of the materials used.
A vapour barrier is not automatically the correct solution for every wall. Some assemblies require carefully continuous vapour-control layers. Traditional solid brick or stone construction may instead benefit from appropriately designed moisture-open systems that allow drying.
The UK government best-practice guidance on internal wall insulation describes the need to assess existing construction, moisture exposure, installation methods and junction detailing before selecting a system.
Single-room projects deserve particular attention at the boundaries of the insulated area. The new insulation stops where the treated wall meets an untreated partition, ceiling, floor or window reveal. These discontinuities can leave colder surfaces and thermal bridges, particularly if the insulation layout is poorly detailed. They do not automatically cause mould, but they create locations that require assessment.
Where an insulated plasterboard system incorporates a vapour-control layer, its joints, edges, penetrations and connections need to follow the specified design. Simply applying tape to a visible gap does not establish that the assembly is moisture-safe. Socket positions, fixings and service penetrations can interrupt airtightness, while intermediate floors and window reveals require appropriate thermal detailing.
The risk is particularly sensitive in historic buildings. The insulation system should work with the way existing masonry absorbs, stores and releases moisture rather than assuming that every wall needs to be sealed against vapour.
Historic England‘s technical guidance also identifies loss of room space, alterations to internal fittings, moisture movement and thermal continuity as important design considerations for traditional buildings.
After installation, inspect skirting boards, corners and adjacent untreated surfaces regularly during the first winter. Use a hygrometer to observe indoor relative humidity trends, and make sure intended ventilation routes remain functional. A hygrometer cannot detect moisture hidden within a wall, so persistent smells, staining or recurring mould require further investigation.
Successful internal insulation is not simply a matter of making the wall warmer from inside. The entire assembly must remain capable of handling moisture, including at the junctions where the new insulation ends.
When Should You Install Internal Insulation to Avoid Condensation During Curing?
Internal insulation should be installed when the chosen materials can dry or cure under the manufacturer’s specified temperature, humidity and ventilation conditions. There is no universally safe installation month. Wet adhesives and plaster finishes introduce moisture that must escape, while mechanically fixed dry systems can reduce construction moisture but still require suitable environmental conditions.
Winter installation can become problematic when a bedroom is poorly ventilated, neighbouring surfaces remain cold and wet construction materials release moisture into the indoor air. Simply raising the heating temperature while keeping the windows closed does not necessarily remove that moisture.
The decision should reflect three practical variables:
- External and internal temperatures: Cold weather can make remaining uninsulated surfaces more vulnerable to condensation, while low indoor temperatures may affect curing or drying.
- Ventilation capacity: Moisture generated during installation needs a suitable route out of the building without exposing the work to unsuitable conditions.
- Installation system: Mechanically fixed boards, adhesive-fixed insulated plasterboard and wet plaster systems may have different temperature, drying and sequencing requirements.
Product datasheets are essential. The required drying period, environmental limits and time before decorating depend on the specific adhesive, plaster, substrate and insulation system. A generic assumption that every system cures within the same period would be unreliable.
A household using intermittent heating faces an additional complication. If the room cools substantially for much of the day, drying may be slower, depending on the product and indoor humidity. The installer may need to arrange suitable background heating and controlled ventilation during the drying period, or postpone the wet finishing stages.
Before work starts, ask the installer to specify the intended room conditions, ventilation arrangements, drying checks and whether the bedroom can safely be occupied during installation and curing. Any existing penetrating damp or unresolved condensation should be investigated beforehand rather than covered by new boards.
Dry fixing methods may minimise moisture introduced during construction, but they do not eliminate the need for a properly designed vapour and airtightness strategy. Material dryness at handover is only one part of long-term moisture safety.
For a cold bedroom that needs to remain occupied, installation disruption and drying conditions may be just as important as the selected insulation’s thermal performance. Once those constraints are understood, the wider heat-loss picture can be reviewed.
How to Find the 3 Biggest Heat-Loss Spots in Your Home in 30 Minutes?
A 30-minute home inspection can identify three priority areas to investigate: the loft or roof, exposed external walls and floors adjoining unheated spaces. These are common heat-loss pathways, but they are not necessarily the three largest in every property. A brief inspection should locate evidence of missing insulation, cold surfaces and draughts rather than attempt to quantify heat loss precisely.
Start with the roof space because inadequate loft insulation can affect multiple rooms beneath it. Warm indoor air can rise and escape through high-level air leaks, while heat is also conducted through a poorly insulated ceiling. The relative importance of roof losses depends on the building’s construction and the insulation already present.
For the first ten minutes, inspect accessible loft areas from a safe position. Look for visibly incomplete or disturbed insulation, exposed ceiling sections and gaps around the loft hatch. Do not enter an unsafe loft, step between joists or obstruct ventilation openings. Existing moisture or suspected electrical hazards should be assessed before intervention.
Use the next ten minutes to examine external walls and their junctions. Compare surface temperatures, investigate window edges and note walls that remain unusually cold. Wind exposure may make draughts more noticeable, particularly where there are gaps around openings.
Spend the final ten minutes checking accessible floor edges and the relationship between rooms and unheated spaces. A bedroom over a garage, cellar or ventilated subfloor deserves particular attention.
| Area inspected | What to look for | Appropriate next step |
|---|---|---|
| Loft and roof | Missing, uneven or disturbed insulation; draughty loft hatch | Check insulation condition, coverage and ventilation requirements |
| External walls | Persistently cold surfaces, gaps and exposed junctions | Identify wall construction and investigate suitable insulation options |
| Floors | Cold boards, draughty edges or an unheated space below | Confirm floor type, access and moisture conditions |
Dust patterns around skirting boards can suggest air movement, although they do not establish the magnitude of heat loss. An infrared thermometer gives useful relative surface comparisons under consistent conditions, but it cannot reliably calculate thermal performance or diagnose hidden moisture.
More detailed investigations may require a thermal survey, inspection of concealed construction or a professional assessment of thermal bridges. Such assessments become especially valuable before expensive internal wall or solid-floor work.
Locating the likely weak points also clarifies why inexpensive draught-proofing products can improve comfort without necessarily delivering the large heating-bill reductions households expect.
Why Do “Easy” Energy Upgrades Cut Bills by Only 5–10% in Winter?
Easy energy upgrades may deliver relatively small bill reductions because they typically address only selected draughts or window-related losses rather than the entire building’s heat demand. A 5–10% saving is not a universal outcome or a verified prediction for every household. Actual savings depend on the home’s starting condition, heating controls, occupancy and the proportion of losses each measure addresses.
Draught excluders, suitable window seals, thermal curtains and secondary window films can improve local comfort by reducing unwanted air movement or heat transfer. They may be particularly useful in a bedroom where the occupant feels a cold draught around the window or door.
However, a well-sealed window does little to improve a largely uninsulated solid external wall. Likewise, insulating a small exposed gap will not address substantial losses through an inadequately insulated roof or suspended floor.
The value of a low-cost upgrade depends on whether it targets a real weakness. A household with a significant, readily fixable draught may see meaningful local improvements. In a property where draughts have already been addressed, repeating similar measures may offer diminishing returns.
The same caution applies when interpreting energy bills. Weather variations, changes in heating hours, tariff differences and occupancy patterns can alter the amount paid, independently of an insulation measure. Comparing bills without accounting for these factors cannot establish the upgrade’s true energy-saving effect.
Low-cost improvements should therefore be treated as targeted interventions rather than substitutes for investigating the building envelope.
- Choose draught-proofing where clear unwanted air leaks have been identified.
- Consider window treatments where glazing-related discomfort is prominent.
- Prioritise appropriate envelope insulation where a wall, roof or floor remains the dominant weakness.
- Preserve necessary background ventilation and never seal intended ventilation openings.
Excessive sealing without ventilation can contribute to poor indoor air quality and moisture accumulation. Draught-proofing should reduce uncontrolled leakage, not prevent the building from receiving the ventilation it needs.
For households with a tight budget, this distinction helps avoid spending repeatedly on minor improvements while leaving the primary source of bedroom discomfort untreated.
A room can become more comfortable long before its overall energy performance changes dramatically. That difference becomes important when evaluating the impact of upgrades on an Energy Performance Certificate.
Key takeaways before investing further
- A bedroom upgrade should first solve the identified comfort problem, rather than assume every improvement will affect the property’s energy rating.
- Keep documentation of concealed insulation, construction details and professional assessments so future energy assessors can identify the work.
- Check the current EPC recommendations before committing a substantial budget specifically to improving the certificate rating.
Why Your EPC Rating Stays Low After Spending £2,000 on Upgrades?
An EPC rating can remain low after £2,000 of improvements because an Energy Performance Certificate assesses the property using a standardised methodology, not the comfort of an individual bedroom. Local insulation work may have limited influence on the modelled rating, particularly when its extent or specification cannot be established during assessment. Spending more does not automatically produce a proportional EPC improvement.
In existing UK homes, energy assessment commonly uses Reduced Data Standard Assessment Procedure (RdSAP), which can apply assumptions when detailed information about the property is unavailable. This creates an important distinction between an upgrade that works physically and an upgrade whose characteristics can be recognised in the assessment.
The UK government guidance on domestic Energy Performance Certificates explains the standardised assessment approach and the use of RdSAP for existing dwellings.
Suppose a household spends £2,000 improving a cold bedroom. This is a hypothetical example, not a documented project or forecast of EPC results. The room might become more comfortable because its exposed wall has been appropriately insulated, yet the EPC change could be modest if only a small proportion of the home’s relevant building fabric has been improved.
Conversely, insulation covering a larger part of the building envelope or improvements to heating and hot-water systems may affect the assessment differently. The result depends on the actual building, the assessment method, the measures recognised and the information available.
Comfort and EPC performance are related but distinct objectives. A successful bedroom retrofit should not be judged solely by whether it raises a letter grade, especially if the household’s immediate concern is overnight cold.
Before commissioning work, review the existing EPC and its recommendations. Ask the installer which parts of the property will be treated, what thermal performance is intended, and what evidence can be retained for a future assessment.
Useful records can include dated photographs before surfaces are covered, invoices, product specifications, installation details and applicable compliance documentation. Requirements for notifications, approvals and certification vary with the work and the UK nation, so these should be confirmed for the specific project rather than assumed to apply uniformly.
Assessment methodologies and relevant rules may also change over time. A new EPC should therefore be considered in light of the method applicable when it is issued, not an assumed future scoring outcome.
Before spending the next portion of the insulation budget, record the bedroom’s overnight temperature, confirm the construction of its coldest element and request an assessment that addresses both heat loss and moisture safety. These steps give the next upgrade a clearer purpose than an EPC score alone.
Can insulating one bedroom guarantee it stays above 16°C all night?
No. Insulation can slow heat loss, but the resulting temperature depends on the room’s heat-loss characteristics, outside conditions, starting temperature and heating schedule. Measure overnight temperatures before and after work under comparable conditions to evaluate the improvement.
Should a bedroom’s ventilation grille be blocked to stop cold draughts?
No. Intended ventilation openings should not be blocked merely to improve warmth. Ventilation helps manage moisture and indoor air quality. If a grille causes uncomfortable airflow, have the ventilation arrangement assessed rather than sealing it without an alternative.
Can a rented bedroom be improved without installing permanent insulation?
Some reversible measures, such as suitable curtains and removable draught excluders, may improve comfort. Their effects depend on the existing defects, and ventilation must be maintained. Structural insulation and unresolved damp should be discussed with the landlord or managing agent before work is undertaken.
Does a cold external wall always mean the bedroom needs internal wall insulation?
No. A cold wall can reflect inadequate insulation, thermal bridging, exposure or other building conditions. The wall type and any moisture problems should be identified first. Depending on the construction, cavity-wall insulation, external insulation or another intervention may be more appropriate.
How can hidden condensation be checked after internal insulation is installed?
Monitor indoor humidity, visible junctions and any changes in odour or staining, but recognise that these checks cannot reliably reveal moisture behind boards. Persistent concerns require a suitably qualified professional to assess the insulation assembly and investigate concealed areas where necessary.